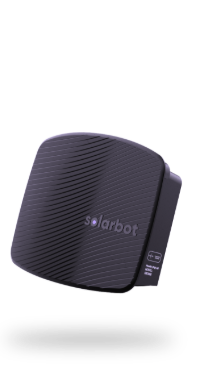
INSTALLATION GUIDE
Manual version: v250728
© Copyright 2025, Plentify.
Contents
Welcome
SolarBot is capable of interfacing with individual inverters or inverters wired in parallel. This manual guides you through the process of connecting SolarBot to parallel inverters.
Note that all connected inverters need to be of the same make and model.
What you'll need
Parallel wiring kit(s)
Note: you'll need a parallel wiring kit for each parallel inverter except the final slave. E.g. if you have 4 inverters in parallel, you will need 3 kits.
* If the supplied cable is not long enough, any straight ethernet cable can be used as long as the RJ45 plug does not have a boot so that it can fit through the gland on the inverter enclosure (see next page).
Power supply and SolarBot to Inverter cable
** Ensure that the cable type is marked with a "C".
How to connect SolarBot to parallel inverters
Example wiring
Remove cover plate from each inverter.
Locate the correct port in which SolarBot parallel inverter cables should be plugged:
Encountered an inverter that looks different? Upload a picture of the available ports and we will advise.
Plug a splitter into all inverters except the final slave in the string (which will receive an inverter to inverter cable directly).
Note: if the selected port already has a cable connected, unplug that cable and insert it into one of the spare ports on the splitter.
Connect SolarBot to the master inverter with the SolarBot to inverter cable:
- RJ12 side plugs into “Inverter” port of SolarBot.
- RJ45 side is inserted through the master inverter’s cable gland and plugs into its RJ45 splitter.
Connect each slave inverter by threading an inverter to inverter cable through the available cable glands on the inverter casing, and plugging the cable into:
- The preceding inverter’s RJ45 splitter.
- The inverter’s RJ45 splitter if it is not the final slave in the string, or directly into the inverter if it is the final slave in the string.
Reinstall the cover plate on each inverter.
Connect SolarBot’s power supply
- Plug the two prong plug of the 12V power supply into a wall socket and turn the switch on.
- Plug the cable into the barrel jack on the right hand side of the SolarBot. Once plugged into the SolarBot, a yellow LED will power up.
- The SolarBot will start up, and after 10 seconds, the main LED will turn solid purple to indicate it has made its Wi-Fi access point available.
Connect master inverter's dongle
- If the master inverter has a dongle, plug this into SolarBot's passthrough port using the SolarBot to dongle cable supplied with SolarBot. (Refer to Step 4: Connect the dongle in the SolarBot installation manual.)
- Dongles for slave inverters should be plugged directly into the inverter as normal.
- Close the SolarBot cover and continue with the normal installation process.
Troubleshooting
Understanding SolarBot's LED colours will make for easy troubleshooting.
Modes
Processes
Issues
- Welcome
- What you'll need
- How to connect SolarBot to parallel inverters
- Troubleshooting
© Copyright 2025, Plentify.